
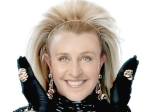


Step 1:
Open the image you want and duplicate it by pressing CTRL+J.
[You must be registered and logged in to see this image.]
Step 2:
Click on the top layer and go to Filter > Other > High Pass. Set the high pass filter to about 5 or 6 depending on what image you are using.
[You must be registered and logged in to see this image.]
Step 3:
Set the top layer style to overlay.
[You must be registered and logged in to see this image.]
Step 4:
Merge the two layers by pressing CTRL+E.
(NOTE: I forgot to do this originally but make a duplicate of this layer after merging and keep it as the bottom layer throughout the rest of the steps.)
[You must be registered and logged in to see this image.]
Step 5:
Now add a layer mask by pressing the layer mask button in the lower right of the screen. (The little square button with a circle in the middle)
[You must be registered and logged in to see this image.]
Step 6:
Make sure the original picture is selected, rather than the layer mask, and go to Filter > Blur > Gaussian Blur. Set the blur to 5.5.
[You must be registered and logged in to see this image.]
Step 7:
Select the layer mask and press Shift+F5. Select 50% gray.
[You must be registered and logged in to see this image.]
Step 8:
Select the brush tool and paint over the eyes, lips, and (if you want) hair.
[You must be registered and logged in to see this image.]
Step 9:
Merge both layers and you're finished!
[You must be registered and logged in to see this image.]


